

Facebow Records Using the Denar ® Slidematic System
Overview
- The facebow transfer establishes the relationship of the maxillary dentition to the hinge axis of rotation of the mandible, enabling the maxillary model to be mounted on the articulator in the correct anatomical position.
- The increasing importance of aesthetic dentistry in Ireland has significantly increased the importance of facebow records and articulators in restorative clinical practice.
- Facebow records provide vital cliical information for the dental laboratory, and are essential for MediMatch to ensure that we consistently provide dental surgeons with restorations of the highest quality.
- MediMatch recommends the Denar ® Slidematic facebow. Our laboratory is equipped with the latest Denar ® articulators, as we believe that they are the proven articulator of choice.
- The Denar ® system allows MediMatch to mount the maxillary cast using only the bitefork assembly supplied by the dental surgeon, so that the relationship with the condylar position is accurately reproduced every time.
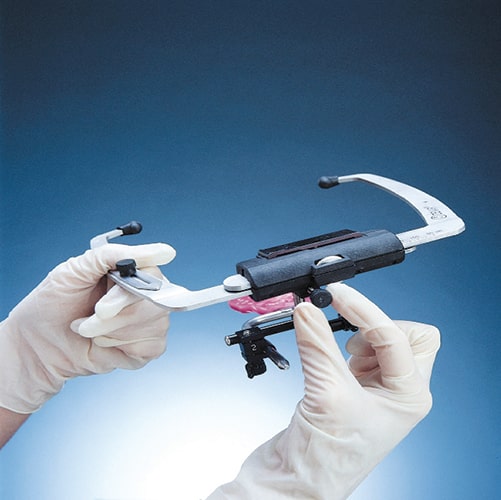
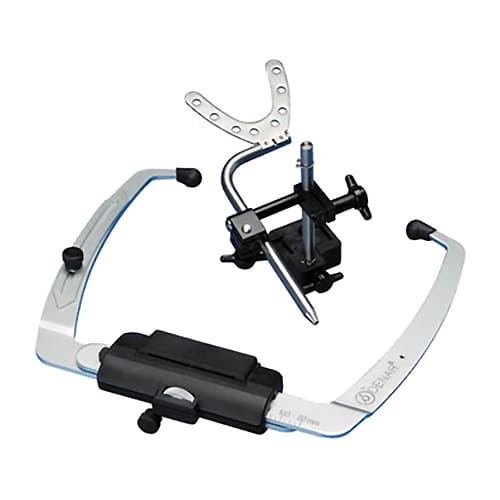
Denar ® Slidematic Facebow Recording Technique
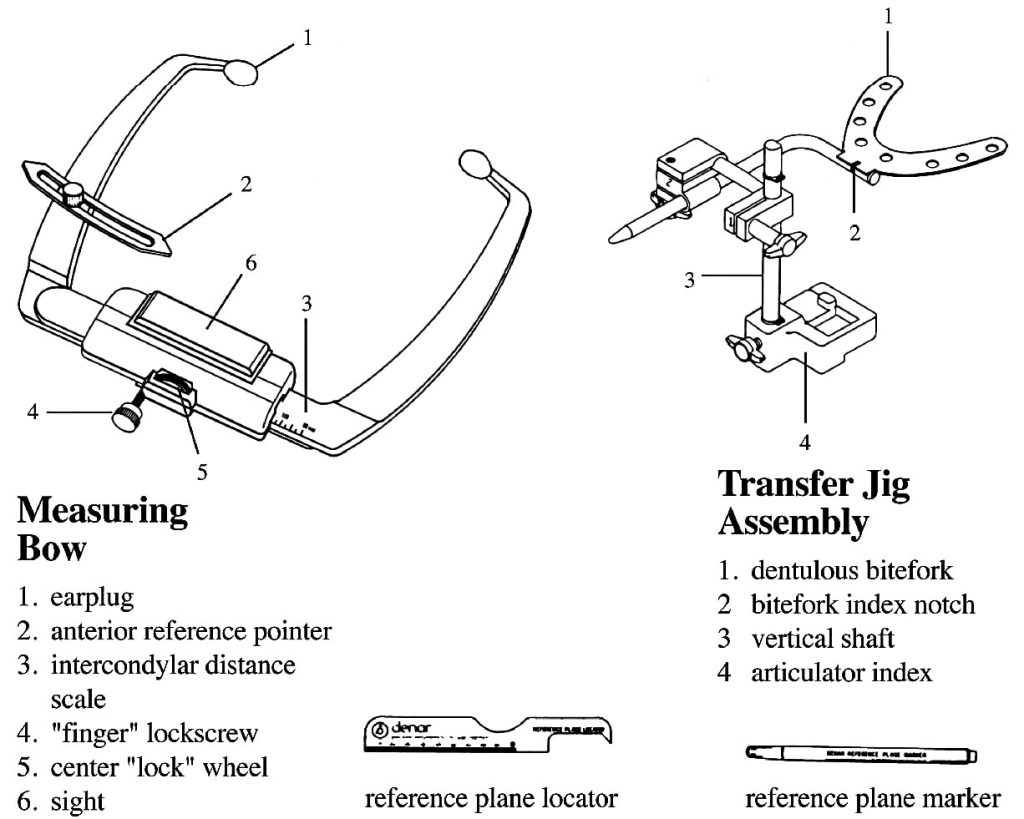
Please refer to the line drawing of the slidematic facebow assembly above to when reviewing the technique description.
MediMatch TIP1
The Denar® system is designed so that multiple transfer jigs can be used with only one measuring bow, so there is no surgery downtime for taking facebow transfer records for other patients.
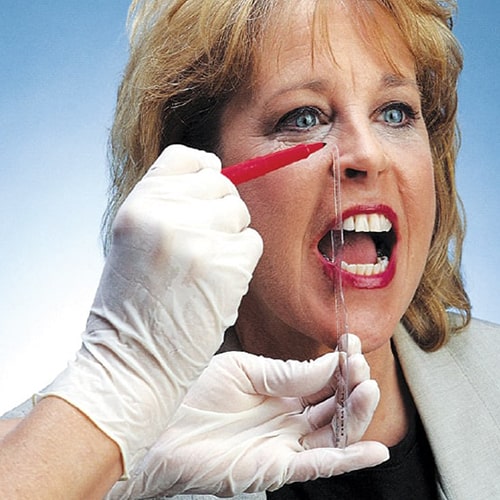
STEP 1
Mark the anterior reference point on the right side of the patient’s face using the Reference Plane Locator and Marker provided.
MediMatch TIP2
For edentulous patients measure upwards from the lower border of the upper lip at rest, and attach the bitefork to the upper wax rim.
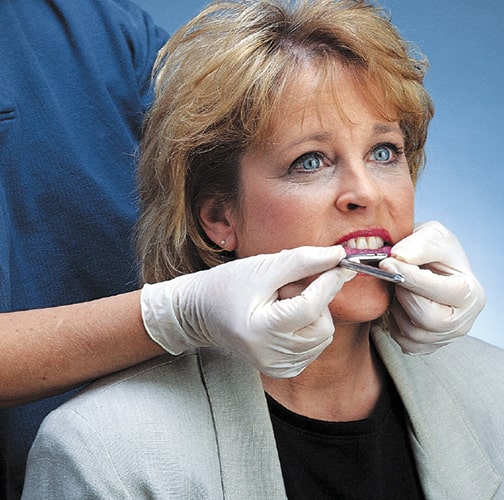
STEP 2
Cover the bite fork with Blu-Mousse ® or *Baseplate Wax softened in warm water, approx. 55 °C (Please refer to the MediMatch “Featured Products” section below).

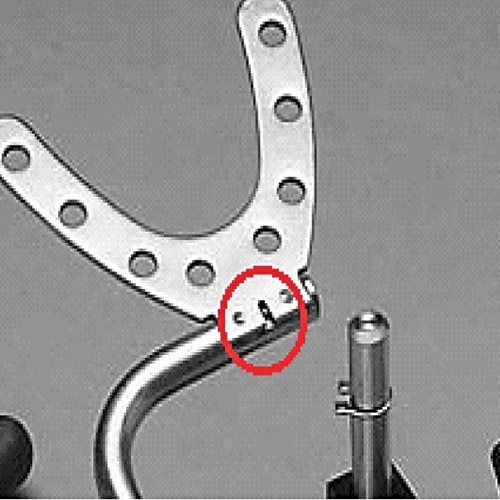
STEP 3
With the bitefork arm to the patient’s right, place the fork into the mouth, aligning the patient’s midline with the bitefork’s index notch to orientate the bitefork correctly, and ensuring that it is parallel with the patient’s coronal and horizontal planes.
A reinforced cotton roll can be placed under the bitefork to stabilize the bite.
STEP 4
Attach the vertical shaft to the measuring bow with clamp marked #2 on the patient’s right and tighten the finger screw (to secure the vertical shaft to the measuring bow and to avoid any movement).
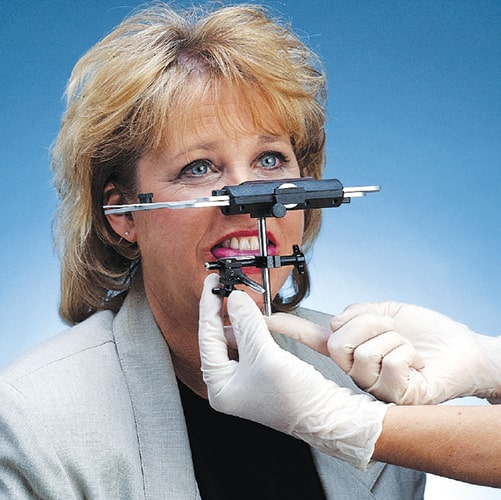
STEP 5
Loosen the center wheel on the top of the measuring bow and slide the bow open to accommodate the width of the patient’s face.
Assemble the facebow on the patient by sliding the bitefork arm through clamp #2 (the facebow earpieces should fit into the patients external auditory meatus).
STEP 6
Tighten the center wheel on the measuring bow and loosen the finger screw on the anterior reference pointer. Raise or lower the bow, so that the pointer or sight aligns precisely with the anterior reference point taken at step 1, and tighten clamp #1, then clamp #2
MediMatch TIP3
When tightening clamps #1 and #2, care must be taken not to displace the bow to either side by allowing the vertical shaft to rest on the fingers.
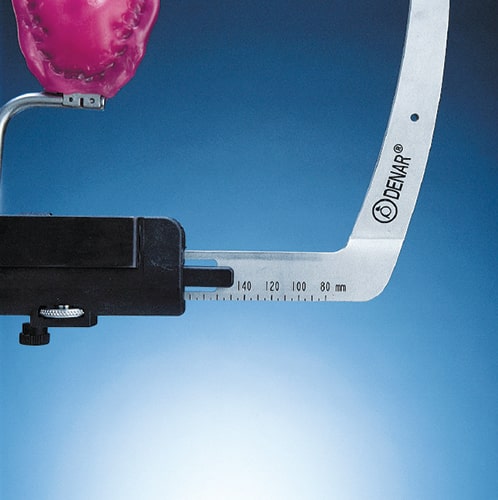
STEP 7
Record the patient’s intercondylar distance (the measurement indicated on the facebow scale).
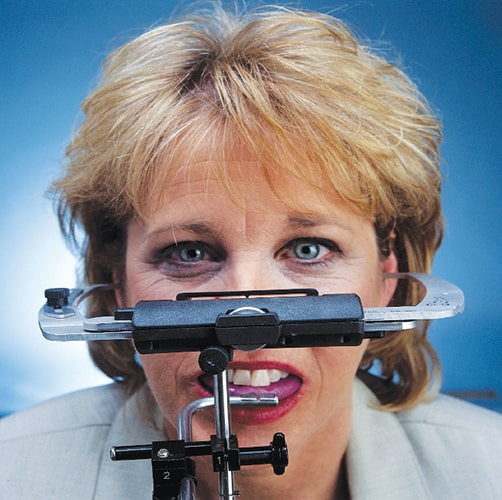
STEP 8
Ask the patient to stand upright, and check that the facebow is parallel to the horizon.
STEP 9
Loosen the finger screw on the facebow, slide it open, and then remove from the patient.
STEP 10
Detach the facebow from the transfer jig by loosening the finger screw (ensure that clamps #1 and #2 are secure).
Images featured in this clinical protocol are reproduced by kind permission of Whipmix ® Corporation, Louisville, Kentucky USA and Shannon Pace DA II
STEP 11
Place the the bitefork and transfer jig in an autoclave or disinfection bath containing an appropriate disinfectant for the time specified in the manufacturer’s instructions.
Remove the bitefork and transfer jig from the decontamination bath, rinse under running water, and then seal in a Grip Seal bag.
Label the grip-seal bag with details of the patient and method of decontamination.
Complete the MediMatch Laboratory Request Form fully, and arrange for despatch to MediMatch as soon as possible.
MediMatch TIP4
Bite registrations must ALWAYS be well packed for transfer to the dental laboratory to avoid breakage – bite registration materials are brittle when set.
The Denar ® facebow and additional bitefork assembly are now ready for the next patient.
MediMatch TIP5
Finger screws and spacers MUST be disinfected in cold disnfectant solution – they MUST NOT be autoclaved. Biteforks MUST be disinfected before each use.
Legal disclaimer
In addition to MediMatch’s normal terms and conditions we would like to point out that:
- This protocol is based on very limited experience Medimatch has with their cases and should only be used as an indication and not restrictive in any way or form.
- This protocol was not based on experience in a clinical environment. Clinicians will use their own technique, according to individual experience and training.
- This protocol should not be followed if the circumstances are different or if in any way or form it is clinically not appropriate to follow it even if the circumstances are similar as in the protocol. Each clinician should make their own decisions and not be restricted to following a protocol made by Medimatch Dental Laboratory Ltd.
- MediMatch Dental Laboratory Ltd is in no way liable for any clinical procedures and will not take responsibility for the use of the content of this protocol in a clinical or non clinical environment. Each clinician is ultimately responsible for their own clinical decisions regardless of any advice given by MediMatch Dental Laboratory Ltd in any form.